Sunday, April 12, 2009

Rossette de Lyon

My next project in this run of salamis was a Rosette de Lyon. The recipe used was from the link below.

http://lpoli.50webs.com/index_files/Salami%20rossette.pdf

Following the proper instructions in mixing and stuffing the casing salami was left hanging in the chamber for just under 60 days. The green weight for this salami was 4.5 lbs. I pulled the salami from the chamber and sliced it at 2.4 lbs. The result when sampled was a bit more mild tasting with a light garlic flavor.

Below is a photograph of a platter of sliced salami I put together using some of the Rossette and an ealier made salami, Luchesse.


Thursday, March 12, 2009

Salami Felino

The next salami on my list is a Felino. Altogether a pretty good salami as salamis go the red wine was noticeable and the mouth feel a bit dry to me. While the recipe indicates that this is a mild flavored salami I found it a little strong for my taste.

I attribute this to the possibility of the deviation from the recipe in as where I should have held the salami at 80% RH for 10 days prior storing at a lower 60% humidity. As I have other salamis curing together with this batch this was a variable that I had to forgo. Altogether though, a pretty tasty salami as as salamis go.


The recipe used was as follows:

3lbs. Pork shoulder
2 lbs. Beef, lean
3/4 cup NF Powdered Milk
5tsp. Kosher salt
1 Tbs. Dextrose
2 tsp. Garlic Powder
1 tsp. Cure #2
2 tsp. Black pepper
1/2 tsp. Sodium Erythorbate
1/4 tsp. Starter culture (LHP)
1/2 cup Red wine

The recipe was taken from:
http://lpoli.50webs.com/index_files/Salami%20felino.pdf


I cased these salamis in #3 collagen casings and fermented them at 80*F and 90% RH for 24 hours. Following the fermentation process they were stored in the curing chamber for approximately 30 days at a temp. of 60* F and 70% humidity. After loosing the prescribed 30% weight I went by feel of the sausage to determine the best maturity.


Here is a photograph of the end result when it was sliced.

Photobucket

Next.... A Rossette de Lyon

Wednesday, March 11, 2009

soppressata

My next attempted creation will be a soppressata. I say attempted because this one didn't turn out with a positive result. I decided to post all results of each attempt as without failures we don't learn, and without learning we can't become educated. I'll keep this post shorter and to the point with an explanation as to why the attempt failed and what the suspect salami will look like.

The recipe for this salami (which was also my first) is as follows:

8 lbs. Pork shoulder
2lbs Fat Back
6 Tbs Kosher Salt
1 cup Powdered Milk
2 Tbs Dextrose
2 tsp Cure #2
4tsp White pepper
1 Tbs Garlic Powder
1 Tbs Red pepper flakes
1/2 tsp starter culture (I used F-RM-52 for this batch)
1/2 cup dry wine

The recipe was taken from
http://lpoli.50webs.com/index_files/Salami%20soppresata%202.pdf

I mixed my spices well in a spice grinder until well mixed.

Adding to the meat prior to grinding I put in my wine, then starter culture. I believe this is where i went wrong. Adding the starter culture before the wine was properly mixed into the meat well enough brought the two into contact with one another with the alcohol killing the culture before it had time to react.

The result was apparent immediately following the fermentation process with the casing separating from the salami showing a odder brownish tint rather that a healthier red tint that the fermentation process will usually display. Here they are after being stuffed and tied.

Photobucket

A photo below will show the two different colors as they appeared.

Photobucket

In review, notice the salami to the far right both front and rear. You may notice the difference in appearance with the healthier red color of the other salamis in front and the rather tan or browner colored salami directly behind it.

The result was even further apparent when the salamis were cut and observed though the cross section.

Though it didn't look so bad, the tell tale smell was quite evident that something had gone horribly wrong. Whenever you notice things that are not quite right, follow your instincts as you are given these for a reason. The nose always knows!

Personally, given the odor, I don't think they could have been mistaken for a healthy tasty salami.

I was able to communicate my concerns with the author of the recipe and he was gracious enough to express his concerns and suggestions. As a benefit in following his advice I now know what I did wrong, the results and can pass this knowledge on to others.

So, that's it. Two for the bin!

Next.... Felino Salami

Coppacollo

The next subject for curing will be the coppa, or capocolla. The coppa is taken fom the upper portion of the boston butt, from the top muscle. In this post I will show how the muscle is cut and sectioned from a shoulder, seasoned and put up for cold curing, then finally put into the casing, tied and cured in the chamber.

We start with a fresh pork shoulder. Notice the section to the left of the shoulder. This is the muscle bundle that will be used in making the coppa.

Photobucket

In seperating the coppa muscle from the shoulder you should have a cut that looks like this.

Photobucket

I trimmed two shoulders for this cure so here we are with the meats cut and ready for cure. These have both been trimmed closely to the size of the casing and seasoning measured was for each cut seperatley. I do this to assure the meats recieved the right amount of cure. The mixture must contain a minimum of 4.5% salt based on the meats weight before curing.

Photobucket

For seasoning I used the following:

5 lb. coppa muscle from the pork shoulder
5Tbs Kosher salt
5TBS Brown sugar
1-1/2 tsp black pepper
1 tsp cure #2
2 tsp Garlic powder
10 Juniper Berries
1/2 tsp mace
1tsp red pepper
2 Tbs Hungarian Paprika

Recipe taken from: http://lpoli.50webs.com/index_files/coppa.pdf

Mix the ingrediants well in a spice mill and after all is mixed divide the amount of the spiced cure into two equal parts. I rub the first part into the meat well covering if necessary with the excess then wrap it well in saran wrap and store them in the meat locker for 10 days at 36 -38*F.

Photobucket

After the 10th day I remove the meat and rub it down again well with the remaining mixture again and store it back in the locker for another 10 days. Ater the meat has been cured for 20 days I remove the saran wrap and rinse off any remaining cure and air dry them on a rack for a few hours. Here they are ready for the drying process.

Photobucket

After drying they are ready to be put into casing. Prior to stuffing the meat into a casing you may again spice to taste using 8parts powdered glucose, 4 parts corn syup solids and 1 part spice mix. The spice mix contained half cayene and half paprika.

I tie my coppa up nicley prior to hanging in the fermenting locker. I fermented these at 80*F for 8 hours. After the fermenting ther were transfered into the curing chamber and held at 60*F and 72% humidity for 21 days. In the photo below the coppa is positioned to the right.

Photobucket

After the perscribed time here it is again.

Photobucket

Here is one of the coppa after removal and slicing.

Photobucket

Next, Salami......

Tuesday, March 10, 2009

Lonzino

Moving on to the lonzino which was started about a week after the bresaola, this post will describe how it was prepared cold cured, cased and tied for hanging.

I started by selecting a full pork loin with an appropriate diameter. I find myself lucky to get my meats from a packing house that is willing to let me pick and choose what I want to use in my projects. While salamis don't really need such attention, I feel solid muscle cures do and I go to these lengths to help assure my projects come out in a positive manner.

Moving on now I prepared the porkloin by sizing it to the casing. I applied a dry cure using the following ingrediants:

8 lbs. Pork loin (a full loin)
3Tbs Salt
1-1/2 Tbs Brown Sugar
1tsp Cure #2
1Tbs Black Pepper
1-1/2 tsp Garlic Powder

Recipe taken from: http://lpoli.50webs.com/index_files/lonzino.pdf

I mixed these ingrediants and ran them through the spice grinder until mixed well. Next I rubbed the cure into the pork loin well using the whole amount of the seasoned cure.

The loin was stored in a refridgerated cooler at 36*F for 14 days for cold curing. Upon removing the porkloin it was thoroughly rinsed and stuffed into a 90mm collagen casing. I tied the cased loin using a butchers twine like so.

Photobucket

In the fermentation process I held the lonzino for 16 hours at 80*F and at a relative humidity of 80%. Following fermentation the subject was moved to the curing chamber where it was held at 58* F for approximately 35 days. The photos below will show it's progress.

Photobucket

Photobucket

The flavor was very much like a proscuitto and it takes just a fraction of the time to make. I've used it in bruschetta, subs, and on it's own drizzled with peppered olive oil and lemon.
It makes a great appetizer or late night snack. Here is a photo of a dish served with bresaola.

Photobucket

Next..... A dry cured Coppa (Cappocollo)

Monday, March 9, 2009

My beloved Bresaola

While the chamber you may have read about now appears fully functional it had to start somewhere. The birth of my first creation, a bresaola, is how I was able to determine everything that would eventually come to pass. This post will describe how the bresaola was made, what efforts were considered and the eventual end result.

I started with a sirloin tip roast. In trimming the subject for the casing size I selected I was able to get just the right fit. This was done though estimation and further trimming would be expected when putting the meat into the casing.

Prior to stuffing the 6 lb.sirloin into the casing I spiced it with the following:

3Tbs Kosher salt
4Tbs Turbinado sugar
1 1/4 tsp cure #2
1Tbs Black Pepper
1 Tsp. Granualted Garlic
2 tsp Rosemary dry
1 tsp Thyme
7 Juniper Berries

Recipe is from http://lpoli.50webs.com/index_files/bresaola.pdf

After mixing the spices in a spice blender or coffee grinder (I use a small cuisenart) I divided the amount of spice in half. Using the first portion of spice I rubbed the sirloin down really well being sure to rub the spices well into the meat and sealed it in a zip lock bag. This went into the refrigerator for 4 days. After the 4th day I drained off any liquid and rubbed the remaining portion into the meat resealing it into the zip lock bag and back into the fridge for another 4 days. After the 4th day I removed the subject from the refrigerator and rinsed off the spices. The sirloin was then slipped into the casing (I used a 90mm collagen casing) being sure to remove all of the air that became trapped in the casing. This can be done by pricking the casing where the air bubbles appear using a toothpick or corn cob holder. Finally the subject is tied nicely to hang in the chamber for a while.

Photobucket

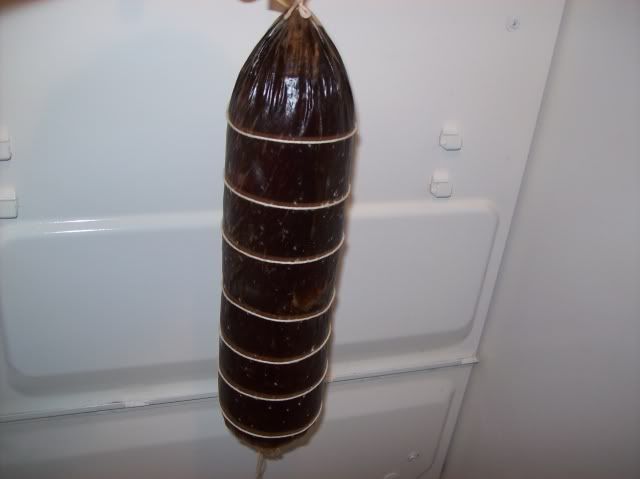
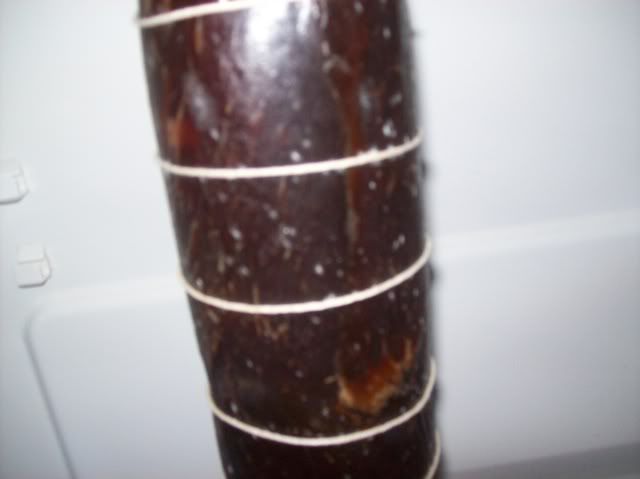
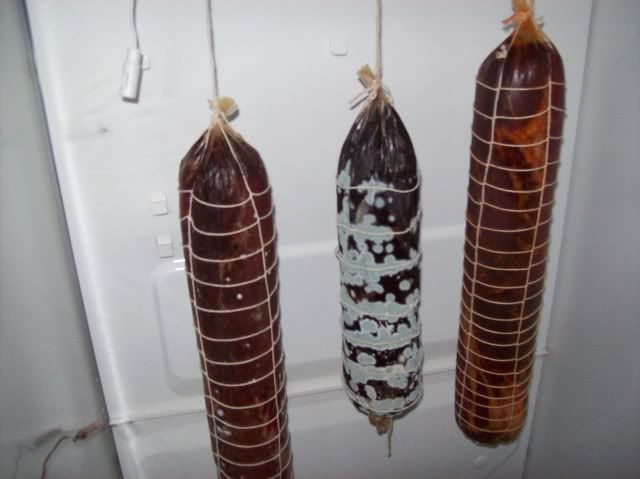
At this time my chamber was in its infant stages. Many of of the accessories had not been installed yet. In time, and as expected a mould began to appear. This mould started of as small white dots.

Photobucket

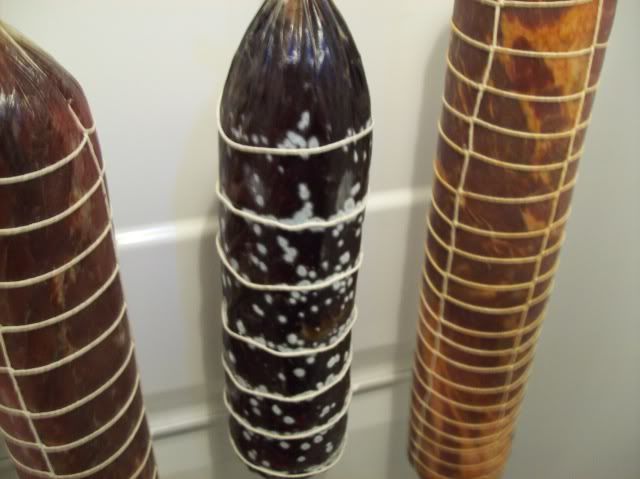
As time went on I also introduced two other meats into the chamber. A Lonzino and a Coppa. I'll post those seprately however, in illustrations you will see them as this progress unfolds.

The mould started taking on a greenish tint and through many reads and a few conversations it was decided that a vinegar wash would be the best order of buisness to relieve the mouldy condition. Here are a few photos of the moulds progress as it unfolded.
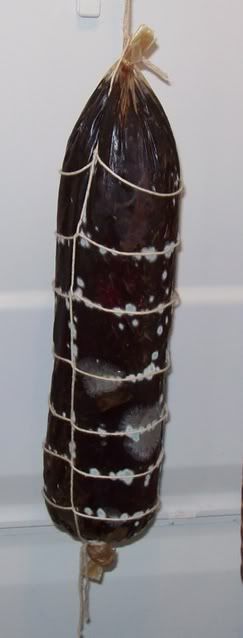
Photobucket

Photobucket

and finally

Photobucket

Photobucket

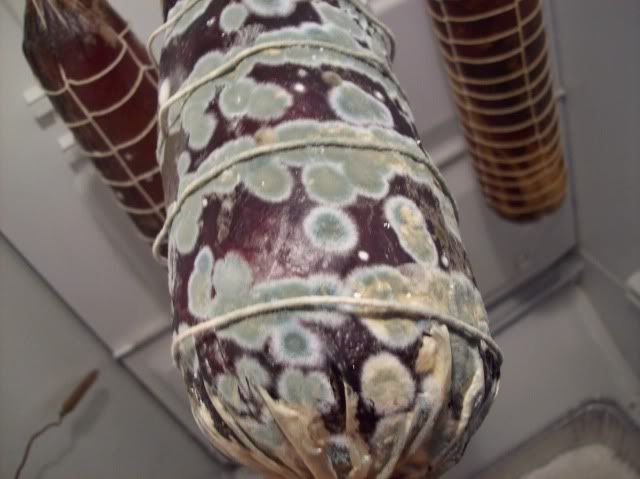
I really started learning at this point as I knew absolutley nothing about moulds however given all the myths, I wanted to be very careful. After a 50/50 vinegar/water wash my bresaola was back in buisness and looking non the worse for wear.

Photobucket

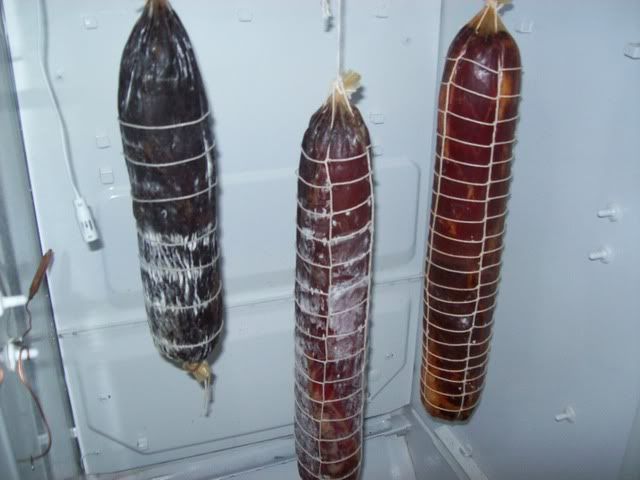
It seems my humidity that was being monitored using an extech temp and humidity monitor was too excessive. The monitor was in error. After a repalcement monitor arrived it was much easier to maintain the chamber without the regeneration of mould. Subsequently, I also decided further modifications were in order and thats when I began installing further wiring to accomodate the vent fan, hygrostat and humidistat.

I continued monitoring the progress on the bresaola until its target weight was achieved which was a loss of 40% of its original weight. Upon the optimum target weight it was time to slice the subject, so, with nothing further to do,,, Here we have it. A marvelous Bresaola.

Photobucket

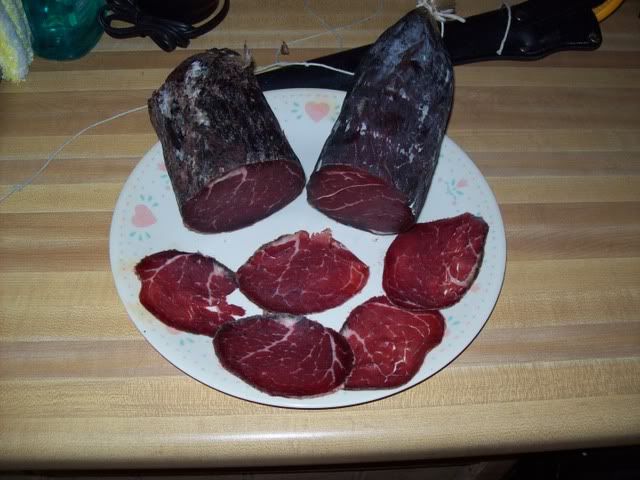
Though it was a great learning experience, this was the beginning of my introduction to the world of salume. Still to come are a lonzino, a coppa and many salamis. I'll post further on these later.

Getting Started

I have read many different ways to dry cure sausages and solid muscle cuts. While many may use a closet, cellar, basement or even a garage, I live in an area that does not offer an atmosphere beneficial to cure salume. This being the case, I decided to build a curing chamber for dry curing a variety of different meats.

In documenting my Salumi adventure, what better place to start better than my first subject, my beloved Bresaola. But first, she'll need a place to rest. So before getting started on how I make my various dry cured meats, lets get into how to build the curing chamber.

First, I started off with a household sized freezer. I found this link very helpful in considering my curing chambers needs and design.
http://www.wedlinydomowe.com/fermented-sausages/equipment.htm

Getting the unit set up to run without management (with exception of adding water occasionally) took a little time through trial and error. Here are the basics on how I accomplished this. It’s a relatively simple conversion regulating all three of the variables, cooling, heating and humidity. Keep in mind my unit is held in a very dry area of my house and this conversion method was based on the units needs given the location.

First I started with a working freezer. I installed a thermostat that would regulate the temperature from -30 to 90*F.


Photobucket

There are other types of temp controllers or you may find a thermostat with a narrower temp range which will also work fine. I set the thermostat to temp 57*F. If the temperature ever climbs to 60* or higher the freezer kicks on, chills the climate to 56 or 57*F and shuts off until it senses a higher temperature again. Should I need a warmer climate I can raise the temp on the thermostat or for fermenting I have a variable temp. heater/fan situated inside the chamber.

I wired in a couple of outlets for the accessories. One outlet is set lower for the heater/fan and fogger and another higher up for the humidistat.


Photobucket

Photobucket


Photobucket


These two accessories, the fogger and the heater/fan, (using the “fan only” mode) are both plugged into the hygrostat and will kick on when the RH falls below 65%. The fogger and the fan come on together and distribute the humidity uniformly throughout the chamber until the humidity reaches 72% then the hygrostat shuts off both the fan and the fogger. The humidity evens out to an average of 69-70% and the unit lays dormant until the next need is sensed.

Should the unit sense an excessive humidity level, the humidistat actuates a 3” 110v hobby fan that blows air out at the lower level ducted by a 3”I.D. piece of PVC pipe.


Photobucket

Photobucket


Installing the fan was just a matter of drilling the hole using a hole saw, mounting the fan on a mounting block and slipping the PVC into the drilled hole. The dryer air is let in at the upper corner of the unit through several drilled holes.

Photobucket

This seems to vent the humidity steadily in a more natural manner, however if the humidity becomes too excessive the fan kicks on pulling the dryer air in from the top and pushing the humid air out at the bottom.


Since I’ve employed this multi system approached my moulds have remained more positive.
In all, it seems a pretty dependable running unit needing very little assistance. I just water the bowl once a week or so, pay the light bill, and everything through proper adjustment seems to work fine.

Photobucket

I’m called away on work for extended periods, up to a week or more at a time so the unit has to operate totally on its own. It’s taken a little thought and time to get everything to operate as it does and there was a medium cost at about $170 - $200 to build but it seems to work fine now that it’s finished.

Thermo, hygro, and humidistat used were obtained from the following links:
http://www.grainger.com/Grainger/items/1RC43
http://www.grainger.com/Grainger/items/1UHG3
http://www.grainger.com/Grainger/items/1UHG2


My fogger came from this site:
http://www.bigappleherp.com/Big-Apple-Ultrasonic-Foggers;jsessionid=0a010b431f43f31bd965616c44ab9447c941028e3d0f.e3eSc38LcheTe34Pa38Ta38Tc350?sc=2&category=10


The 3” exhaust fan can be obtained from the following link:
http://www.radioshack.com/product/index.jsp?productId=2103787

The variable temp heater/fan was purchased on sale at a home center.

The digital monitor I use was purchased from Extech.
http://www.grainger.com/Grainger/items/5PE71
It can be obtained at a more inexpensive price elsewhere, however I would suggest a medium level mechanical hygrometer. These can be purchased from around $10 - $100.00 depending on the quality you choose.

Many of these mechanical accessories can be found more inexpensively if you do a good search online for competitive prices.


Prior to beginning the dry cure process here are some suggested links for reading:

http://www.wedlinydomowe.com/fermented-sausages.htm

http://home.pacbell.net/lpoli/page0001.htm